Hai To Tomar Jonno
---------------------------------
May be it is for you that
I have become love’s slave
I know that you are unmatched
But I extend my hands for your support
Whenever in solitude
I have vearned for you
I have rushed for always from
The beginning to the end of this world
I am immersed in myself
I know not vour openion
Even if something unusal happens
Still I would need you always
May be it is for you that
I have become love’s slave
I know that you are unmatched
But I extend my hands for your support
Whenever in solitude
I am so dangerously in love
Seeing only happiness in my eyes
I spread my dreams though
The air in all directions
You have not said I’m bad
Still why this resistance
Do not be ruled by your mind
Let’s leave everything and go.
May be it is for you that
I have become love’s slave
I know that you are unmatched
But I extend my hands for your support
Whenever in solitude
I have vearned for you
I have rushed for always from
The beginning to the end of this world
Friday, August 19, 2011
Swami Vivekananda's Concluding Speeches
Swami Vivekananda's Speeches
The World Parliament of Religions, Chicago

Swami Vivekananda
CONCLUDING ADDRESS - Chicago, Sept 27, 1893
The World's Parliament of Religions has become an accomplished fact, and the merciful Father has helped those who labored to bring it into existence, and crowned with success their most unselfish labor.

Swami Vivekananda, ParamHanswa Ramakrishna Dev, Sarada Maa
My thanks to those noble souls whose large hearts and love of truth first dreamed this wonderful dream and then realized it. My thanks to the shower of liberal sentiments that has overflowed this platform. My thanks to this enlightened audience for their uniform kindness to me and for their appreciation of every thought that tends to smooth the friction of religions. A few jarring notes were heard from time to time in this harmony. My special thanks to them, for they have, by their striking contrast, made general harmony the sweeter.
Much has been said of the common ground of religious unity. I am not going just now to venture my own theory. But if anyone here hopes that this unity will come by the triumph of any one of the religions and the destruction of the others, to him I say, "Brother, yours is an impossible hope." Do I wish that the Christian would become Hindu? God forbid. Do I wish that the Hindu or Buddhist would become Christian? God forbid.

Parliament of Religions In Chicago
The seed is put in the ground, and earth and air and water are placed around it. Does the seed become the earth, or the air, or the water? No. It becomes a plant. It develops after the law of its own growth, assimilates the air, the earth, and the water, converts them into plant substance, and grows into a plant.
Similar is the case with religion. The Christian is not to become a Hindu or a Buddhist, nor a Hindu or a Buddhist to become a Christian. But each must assimilate the spirit of the others and yet preserve his individuality and grow according to his own law of growth.
 If the Parliament of Religions has shown anything to the world, it is this: It has proved to the world that holiness, purity and charity are not the exclusive possessions of any church in the world, and that every system has produced men and women of the most exalted character. In the face of this evidence, if anybody dreams of the exclusive survival of his own religion and the destruction of the others, I pity him from the bottom of my heart, and point out to him that upon the banner of every religion will soon be written in spite of resistance: "Help and not fight," "Assimilation and not Destruction," "Harmony and Peace and not Dissension."
Swami Vivekananda's Welcome Speeches
Swami Vivekananda's Speeches
The World Parliament of Religions, Chicago

Swami Vivekananda
WELCOME ADDRESS - Chicago, Sept 11, 1893
Sisters and Brothers of America,
It fills my heart with joy unspeakable to rise in response to the warm and cordial welcome which you have given us. I thank you in the name of the most ancient order of monks in the world; I thank you in the name of the mother of religions, and I thank you in the name of millions and millions of Hindu people of all classes and sects.

Swami Vivekananda, ParamHanswa Ramakrishna Dev, Sarada Maa
My thanks, also, to some of the speakers on this platform who, referring to the delegates from the Orient, have told you that these men from far-off nations may well claim the honor of bearing to different lands the idea of toleration. I am proud to belong to a religion which has taught the world both tolerance and universal acceptance. We believe not only in universal toleration, but we accept all religions as true. I am proud to belong to a nation which has sheltered the persecuted and the refugees of all religions and all nations of the earth. I am proud to tell you that we have gathered in our bosom the purest remnant of the Israelites, who came to Southern India and took refuge with us in the very year in which their holy temple was shattered to pieces by Roman tyranny. I am proud to belong to the religion which has sheltered and is still fostering the remnant of the grand Zoroastrian nation. I will quote to you, brethren, a few lines from a hymn which I remember to have repeated from my earliest boyhood, which is every day repeated by millions of human beings: "As the different streams having their sources in different paths which men take through different tendencies, various though they appear, crooked or straight, all lead to Thee."

Parliament of Religions In Chicago
The present convention, which is one of the most august assemblies ever held, is in itself a vindication, a declaration to the world of the wonderful doctrine preached in the Gita: "Whosoever comes to Me, through whatsoever form, I reach him; all men are struggling through paths which in the end lead to me." Sectarianism, bigotry, and its horrible descendant, fanaticism, have long possessed this beautiful earth. They have filled the earth with violence, drenched it often and often with human blood, destroyed civilization and sent whole nations to despair. Had it not been for these horrible demons, human society would be far more advanced than it is now. But their time is come; and I fervently hope that the bell that tolled this morning in honor of this convention may be the death-knell of all fanaticism, of all persecutions with the sword or with the pen, and of all uncharitable feelings between persons wending their way to the same goal.
Who is the leader of youth of INDIA ..................... ??

ARVIND KEJRIVAL:-
Mechanical Engineer -IIT Kharagpur
Job :-Tata Steel
Former IRS (Indian Revenue Service) resigned from the Govt. job (posted IT Commissioner’s office)
Social Activist:-
Man behind (Right to Information Act).
LokPal bill
Awards Various Ashoka Fellow, Civic Engagement.
2005: 'Satyendra Dubey Memorial Award', IIT Kanpur for his campaign for bringing transparency in Government
2006: Ramon Magsaysay Award for Emergent Leadership.
2006: CNN-IBN, 'Indian of the Year' in Public Service
2009: Distinguished Alumnus Award, IIT Kharagpur for Emergent Leadership.
2010: Policy Change Agent of the Year, Economic Times Corporate Excellence Award along with Aruna Roy.
Fighting against corruption
.............He left his job in IRS to fight against corruption.
===============================================
RAHUL GANDHI :-
Education- failed to secure passing grades in National Economic Planning and Policy graduated by any how
job: Got ancestral political power and running through it
Award: he is making awards not getting it
Fight against Indians sentiments
For him Terror attacks are common thing...
we should not be worried of that.....let it happen(since they have z class security)
he will never talk about Govt. policies....and planning....since he
is not intelligent enough to grasp that.(claimed to be most eligible to be PM)
Won't talk about black money and corruption.
will never talk in Parliament.
No political vision and goals for nation .
Trained well to fool poor villagers with safed kurta ..nd khadhi(doing same in UP and other places.)
Rahul had violated Section 144 of CrPC in Uttar Pradesh when he visited the villages of Bhatta-Parsaul earlier this year.
Home minister P Chidambaram backed him.
Achievements:-
Grandson OF Nehru,
Grandson of Indira Gandhi....
Son Of Rajiv gandhi....
FRom Gandhi Family.....
till now zero...
===========================================
Who is the leader of youth of INDIA ..................... ??
Don’t do things for someone's satisfaction do it for self-satisfaction. -
Thanks and regards,
Friday, August 12, 2011
জন্যইনা
জন্যইনা
-----------
দেখা হয়ে ছিল সেদিনও মনের আঙিনা শেষে
হারায়ে দিবসে পথ, ঠাঁই নাই- ঠাঁই নাই-
পাথর অবধি ফাটিয়াছে কপোলও পান পাতে
হারায়েছে ধারা স্ফটিক বিন্দু বিফল মাথা কুটে।
ফুল ফুটেছে নদীর চরে নতুন রংএর মেলা
জোয়ার মেতে ভেলায় সাথে খেলা আর খেলা
মন ছুটেছে পাহাড় পানে নতুনে পা ফেলে
হিসেব হবে পরের খাতায় উদ্যম না কমে।
ঐ যে তারারা আছে সাথে মিটমিটিয়ে চেয়ে
গোদ্য রুটি লাগছে এখন মিষ্টি পুরবরাগে
চাইলে তুমি সোনার হরিন আনব ধরে তবে
খামখেয়ালী নয়তো এটা উড়নচণ্ডী হবে।
Deployment Procedure in Tomcat-Axis2
Deployment Procedure in Tomcat-Axis2
------------------------------------------------
There are different types of deployment procedures are available for different server container in the software industry. Here we are following one of them as .war file in Tomcat. Deployment procedure steps are giving bellow:-
A. Application .war file deployment procedure
1. Install Java-5 or upper version (we are using Java-6)

2. Download and Install Tomcat-6.0

3. Download Axis2-1.5.0 (binary distribution) or upper version (we are using Axis2-1.5.1).
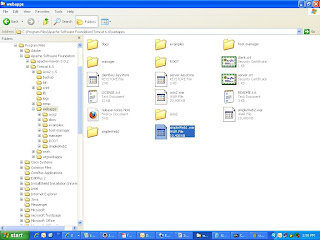
4. Extract and place Axis2 under Tomcat installation directory.

Note: To open environment path setting got to start=>right click on Computer=>properties=>Advanceseting or advance tab=>Environment Variables
5. Set classpath CLASSPATH as java installation bin directory.

6. Set classpath CATELINA_HOME as tomcat-6.0 installation directory.

7. Set classpath AXIS2_HOME as Axis2 folder path.

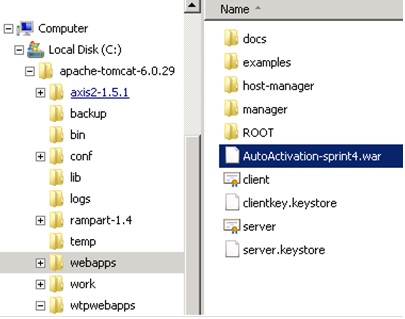
8. Copy application .war file in webapps (32 bit OS) or wtpwebapps (64 bit OS) directory in tomcat.

9. Start Tomcat server.
When server will start then tomcat extract war file and create a folder for the application. This folder contains all class files, library files and configuration file to run the application in the container.
10. Stop Tomcat server.
11. Go to webapps or wtpwebapps directory and remove the application .war file.
12. Now deployment is completed.
B. Application .aar file deployment procedure
1. Install Java-5 or upper version (we are using Java-6)

2. Download and Install Tomcat-6.0

3. Download Axis2-1.5.0 (binary distribution) or upper version (we are using Axis2-1.5.1).
4. Extract and place Axis2 under Tomcat installation directory.

5. Download Axis2.war file.
6. Copy or deploy Axis2.war file in tomcat webapps (32 bit OS) or wtpwebapps (64 bit OS) directory.

7. Set classpath CLASSPATH as java installation bin directory.

8. Set classpath CATELINA_HOME as tomcat-6.0 installation directory.

9. Set classpath AXIS2_HOME as Axis2 folder path.

10. Start Tomcat server.
When server will start then tomcat extract axis2.war file and create axis2 folder for the application web service container. Now check axis2 application service link.
a. Open web browser and type the URL to access axis2 application like http://hostname:port/axis2/ [http://localhost:8080/axis2/]

b. In this link you will get service link for web service details. http://hostname:port/axis2/service/ [http://localhost:8080/axis2/service/]

11. Stop Tomcat server.
12. Go to webapps or wtpwebapps directory and remove the axis2.war file.
13. Now deploy web service application .aar file in axis2.
a. Open browser and type URL http://hostname:port/axis2/

b. Click on “administration” link and login using axis2 credential.
User name : admin
Password : axis2

c. Click on “upload web service” to upload .aar file

d. Select .aar file and click on “Upload” button. “Web service uploaded successfully” message will be display after upload.

e. Click on “Log out” link.
f. Now click on “service” link to see the web service.

g. Click on web service to see the WSDL file of web service.
14. Here deployment is completed.
------------------------------------------------
There are different types of deployment procedures are available for different server container in the software industry. Here we are following one of them as .war file in Tomcat. Deployment procedure steps are giving bellow:-
A. Application .war file deployment procedure
1. Install Java-5 or upper version (we are using Java-6)

2. Download and Install Tomcat-6.0

3. Download Axis2-1.5.0 (binary distribution) or upper version (we are using Axis2-1.5.1).
4. Extract and place Axis2 under Tomcat installation directory.

Note: To open environment path setting got to start=>right click on Computer=>properties=>Advanceseting or advance tab=>Environment Variables
5. Set classpath CLASSPATH as java installation bin directory.

6. Set classpath CATELINA_HOME as tomcat-6.0 installation directory.

7. Set classpath AXIS2_HOME as Axis2 folder path.

8. Copy application .war file in webapps (32 bit OS) or wtpwebapps (64 bit OS) directory in tomcat.
9. Start Tomcat server.
When server will start then tomcat extract war file and create a folder for the application. This folder contains all class files, library files and configuration file to run the application in the container.
10. Stop Tomcat server.
11. Go to webapps or wtpwebapps directory and remove the application .war file.
12. Now deployment is completed.
B. Application .aar file deployment procedure
1. Install Java-5 or upper version (we are using Java-6)

2. Download and Install Tomcat-6.0

3. Download Axis2-1.5.0 (binary distribution) or upper version (we are using Axis2-1.5.1).
4. Extract and place Axis2 under Tomcat installation directory.

5. Download Axis2.war file.
6. Copy or deploy Axis2.war file in tomcat webapps (32 bit OS) or wtpwebapps (64 bit OS) directory.

7. Set classpath CLASSPATH as java installation bin directory.

8. Set classpath CATELINA_HOME as tomcat-6.0 installation directory.

9. Set classpath AXIS2_HOME as Axis2 folder path.

10. Start Tomcat server.
When server will start then tomcat extract axis2.war file and create axis2 folder for the application web service container. Now check axis2 application service link.
a. Open web browser and type the URL to access axis2 application like http://hostname:port/axis2/ [http://localhost:8080/axis2/]

b. In this link you will get service link for web service details. http://hostname:port/axis2/service/ [http://localhost:8080/axis2/service/]

11. Stop Tomcat server.
12. Go to webapps or wtpwebapps directory and remove the axis2.war file.
13. Now deploy web service application .aar file in axis2.
a. Open browser and type URL http://hostname:port/axis2/

b. Click on “administration” link and login using axis2 credential.
User name : admin
Password : axis2

c. Click on “upload web service” to upload .aar file

d. Select .aar file and click on “Upload” button. “Web service uploaded successfully” message will be display after upload.

e. Click on “Log out” link.
f. Now click on “service” link to see the web service.

g. Click on web service to see the WSDL file of web service.
14. Here deployment is completed.
Multi Context URL Configuration
Multi Context URL Configuration
--------------------------------------------
1. Overview Multi Context URL Configuration
Web server allows configuring multiple contexts URL. Tomcat also allows configuring multiple URL configurations for single application i.e. multiple URL points to the same war file or application directory. It is web server configuration process. For multiple URL configurations for single application need to provide configuration details in server configuration file.
In this document trying to explain how to access WSTransalationService application using two URL /activation and /WSTranslationService.
2. Tomcat Configuration
Tomcat server configuration file name server.xml. Provide context details in tomcat configuration file. If any configuration is not available in tomcat then it offers the application war file name or application directory name as the application context to access the application.
As example if application war file name or application name “WSTransalationService” then that application URL like http://<serverName>:<port>/WSTransalationService. Application name and URL both will be same by default [note: URL case sensitive].
2.1. Context Details
Context syntax
<context source="org.eclipse.jst.jee.server:WSTransalationService" reloadable="true" path="URL" docbase="war file path">
Context example
<context source="org.eclipse.jst.jee.server:WSTransalationService" reloadable="true" path="/WSTransalationService" docbase="C:\apache-tomcat-6.0.29\webapps\WSTransalationService">
2.2. Tomcat Configuration
Open server.xml file : go to tomcat installation directory => conf =>server.xml
Add context details in side <host>tag for URL configuration for /activation and /WSTransalationService.
<host name="localhost" appbase="webapps" autodeploy="true" unpackwars="true" xmlnamespaceaware="false" xmlvalidation="false">
<context source="org.eclipse.jst.jee.server:WSTransalationService" reloadable="true" path="/activation" docbase="C:\apache-tomcat-6.0.29\webapps\WSTransalationService">
<context source="org.eclipse.jst.jee.server:WSTransalationService" reloadable="true" path="/WSTransalationService" docbase="C:\apache-tomcat-6.0.29\webapps\WSTransalationService">
</host>
Start tomcat server and send request.
2.3. Application in Tomcat Admin portal
Two application instances will be create in tomcat virtually. Tomcat admin portal display two URL and instance details. /activation and /WSTransalationService application instance will be visible in tomcat admin portal.

2.4. Access Application with multiple URL
Open browser and send URL: http://localhost:8080/WSTransalationService/ or https://localhost:443/WSTransalationService/

Open browser and send URL: http://localhost:8080/activation/ or https://localhost:443/activation/

Thursday, August 11, 2011
Spring Web Service Step by Step
Spring Web Service Step by Step
---------------------------------------
This tutorial will guide you through building a simple web service using spring framework. This tutorial assumes that you have gone through Tutorials 1-10 & the source code for tutorials 1-10. Also refer to spring-ws-reference.pdf (http://www.lulu.com/items/volume_62/1253000/1253871/1/print/1253871.pdf & http://static.springframework.org/spring-ws/site/reference/pdf/spring-wsreference.pdf) for further information.
Step 0: Open command prompt and the go to project base directory. Here E:\aarruunn>
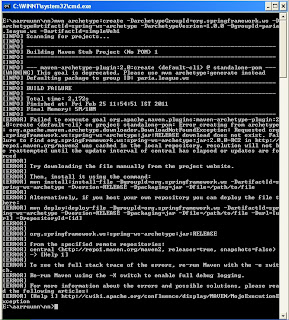
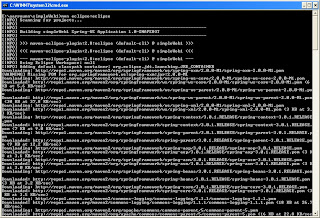
Step 1: Create a project named simpleWeb1. Run the following command in a command window:
C:\aarruunn> mvn archetype:create -DarchetypeGroupId=org.springframework.ws
-DarchetypeArtifactId=spring-ws-archetype -DarchetypeVesrion=1.0.0
-DgroupId=paria.league.ws -DartifactId=simpleWeb1
Note: Maven2 archetype:create is deprecated so first command may not be worked then you get error. Please used second command.
Or
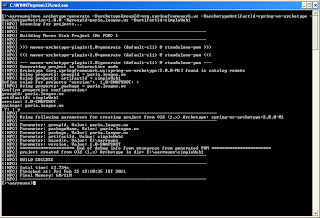
C:\ aarruunn> mvn archetype:generate
-DarchetypeGroupId=org.springframework.ws
-DarchetypeArtifactId=spring-ws-archetype -DarchetypeVesrion=1.0.0
-DgroupId=paria.league.ws -DartifactId=simpleWeb1
In second command ask for the package name verification Y:. Provide y and press enter button to create project structure.
package: paria.league.ws
Y: : y
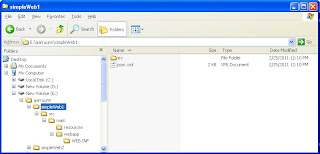
Step 2: Now you should have the simpleWeb1 project with some basic files like pom.xml simpleWeb1 folder and web.xml, spring-ws-servlet.xml under WEB-INF folder.
Step 3: Next step is to generate eclipse metadata using the mvn command as shown below: C:\tutorials\simple-tutorial\simpleWeb2>mvn eclipse:eclipse
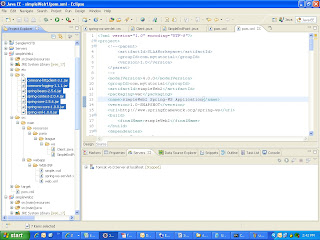
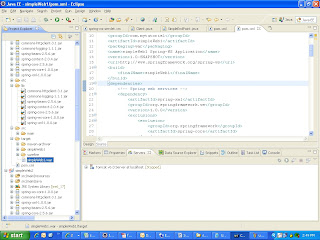
Step 4: Open the pom.xml file under “C:\aarruunn\simpleWeb1” in a notepad and modify it to look as shown below.
<?xml version="1.0" encoding="UTF-8"?>
<project>
<!--<parent>
<artifactId>SLAAWorkspace</artifactId>
<groupId>com.mytutorial</groupId>
<version>1.0</version>
</parent>
-->
<modelVersion>4.0.0</modelVersion>
<groupId>com.mytutorial</groupId>
<artifactId>simpleWeb1</artifactId>
<packaging>war</packaging>
<name>simpleWeb1 Spring-WS Application</name>
<version>1.0-SNAPSHOT</version>
<url>http://www.springframework.org/spring-ws</url>
<build>
<finalName>simpleWeb1</finalName>
</build>
<dependencies>
<!-- Spring web services -->
<dependency>
<artifactId>spring-xml</artifactId>
<groupId>org.springframework.ws</groupId>
<version>1.0.0</version>
<exclusions>
<exclusion>
<groupId>org.springframework</groupId>
<artifactId>spring-core</artifactId>
</exclusion>
<exclusion>
<groupId>org.springframework</groupId>
<artifactId>spring-beans</artifactId>
</exclusion>
<exclusion>
<groupId>commons-logging</groupId>
<artifactId>commons-logging</artifactId>
</exclusion>
<exclusion>
<groupId>jdom</groupId>
<artifactId>jdom</artifactId>
</exclusion>
<exclusion>
<groupId>dom4j</groupId>
<artifactId>dom4j</artifactId>
</exclusion>
</exclusions>
</dependency>
<dependency>
<artifactId>spring-oxm-tiger</artifactId>
<groupId>org.springframework.ws</groupId>
<version>1.0.0</version>
<exclusions>
<exclusion>
<groupId>org.springframework</groupId>
<artifactId>spring-core</artifactId>
</exclusion>
<exclusion>
<groupId>org.springframework</groupId>
<artifactId>spring-beans</artifactId>
</exclusion>
<exclusion>
<groupId>commons-logging</groupId>
<artifactId>commons-logging</artifactId>
</exclusion>
<exclusion>
<groupId>com.thoughtworks.xstream</groupId>
<artifactId>xstream</artifactId>
</exclusion>
</exclusions>
</dependency>
<dependency>
<artifactId>spring-ws-core-tiger</artifactId>
<groupId>org.springframework.ws</groupId>
<version>1.0.0</version>
<exclusions>
<exclusion>
<groupId>org.springframework</groupId>
<artifactId>spring-core</artifactId>
</exclusion>
<exclusion>
<groupId>org.springframework</groupId>
<artifactId>spring-beans</artifactId>
</exclusion>
<exclusion>
<groupId>org.springframework</groupId>
<artifactId>spring-context</artifactId>
</exclusion>
<exclusion>
<groupId>org.springframework</groupId>
<artifactId>spring-web</artifactId>
</exclusion>
<exclusion>
<groupId>org.springframework</groupId>
<artifactId>spring-webmvc</artifactId>
</exclusion>
</exclusions>
</dependency>
<dependency>
<groupId>com.sun.xml.messaging.saaj</groupId>
<artifactId>saaj-impl</artifactId>
<version>1.3</version>
<scope>runtime</scope>
<exclusions>
<exclusion>
<groupId>javax.activation</groupId>
<artifactId>activation</artifactId>
</exclusion>
</exclusions>
</dependency>
<dependency>
<groupId>javax.activation</groupId>
<artifactId>activation</artifactId>
<version>1.1</version>
</dependency>
<dependency>
<groupId>javax.servlet</groupId>
<artifactId>servlet-api</artifactId>
<version>2.4</version>
<scope>provided</scope>
</dependency>
<dependency>
<groupId>jdom</groupId>
<artifactId>jdom</artifactId>
<version>1.0</version>
</dependency>
<dependency>
<groupId>jaxen</groupId>
<artifactId>jaxen</artifactId>
<version>1.1</version>
</dependency>
<dependency>
<groupId>javax.xml.soap</groupId>
<artifactId>saaj-api</artifactId>
<version>1.3</version>
<scope>runtime</scope>
</dependency>
<dependency>
<groupId>org.springframework</groupId>
<artifactId>spring</artifactId>
<version>2.0.6</version>
</dependency>
</dependencies>
</project>
Note: Thetags will remove any transitive dependencies you would like to exclude. Look at the .pom file as shown above for the dependencies defined and you can exclude them if you wish.
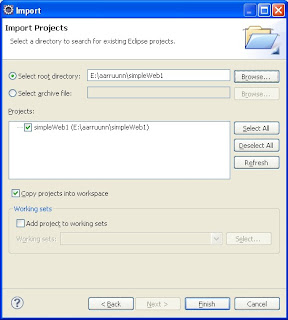
Step 5: We can now import this project into eclipse. File => Import and then
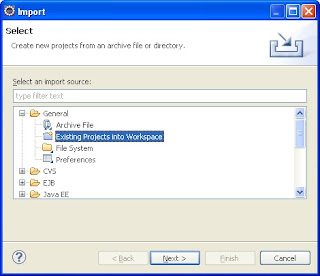
Clieck Next => Browse select simpleWeb1 project structure and OK.
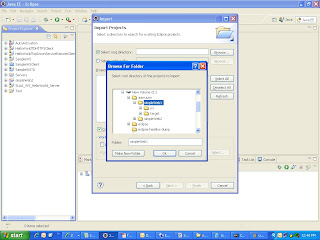
Click on Finish
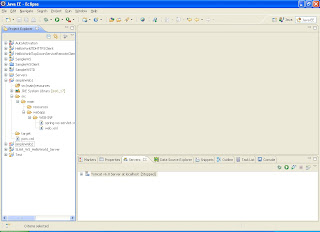
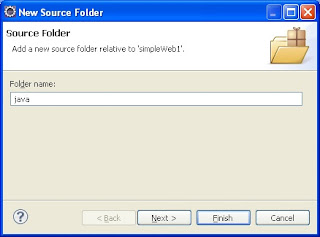
Step 6: Next step is to create a folder “java” for the java files under “src/main”. Right click on simpleWeb1 and select “properties”. Click on
simpleWeb1 => properties => addFolder
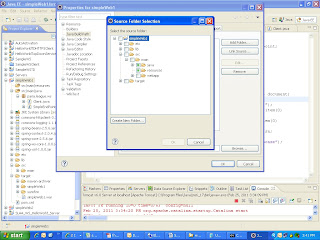
Click on Create New Folder provide java and Finish
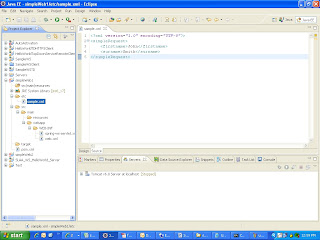
Step 7: Now define the input XML file and its contract. Create a new folder “etc” under “simpleWeb1” for any miscellaneous files like “simple.xml” that are not packaged.
<simpleRequest>
<firstname>John</firstname>
<surname>Smith</surname>
</simpleRequest>
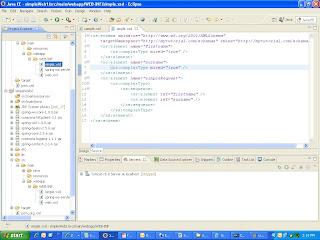
Step 8: The next step is to define the schema definition for the above xml file. The “simple.xsd” should be created under “C:\tutorials\simple-tutorial\simpleWeb2\src\main\webapp\WEBINF” as shown below:
<xs:schema xmlns:xs="http://www.w3.org/2001/XMLSchema"
targetNamespace="http://mytutorial.com/schemas"
xmlns="http:// paria.league.ws/schemas">
<xs:element name="firstname">
<xs:complexType mixed="true" />
</xs:element>
<xs:element name="surname">
<xs:complexType mixed="true" />
</xs:element>
<xs:element name="simpleRequest">
<xs:complexType>
<xs:sequence>
<xs:element ref="firstname" />
<xs:element ref="surname" />
</xs:sequence>
</xs:complexType>
</xs:element>
</xs:schema>
Step 9: The web.xml can remain as it is.
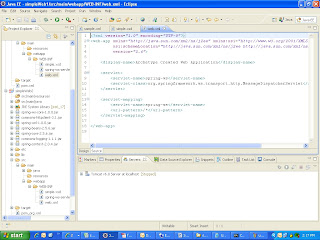
Step 10: With spring-ws, you do not have to define the .wsdl file. It will be automatically generated based on your simple.xsd file you just created and the simple-ws-servlet.xml (the file convention is -servlet.xml) file you are about to define.
<?xml version="1.0" encoding="UTF-8"?>
<beans xmlns="http://www.springframework.org/schema/beans"
xmlns:xsi="http://www.w3.org/2001/XMLSchema-instance"
xsi:schemaLocation="http://www.springframework.org/schema/beans
http://www.springframework.org/schema/beans/spring-beans-2.0.xsd">
<bean id="simpleEndPoint" class="paria.league.ws.SimpleEndPoint" />
<bean class="org.springframework.ws.server.endpoint
.mapping.PayloadRootQNameEndpointMapping">
<property name="mappings">
<props>
<prop key="simpleRequest">simpleEndPoint</prop>
</props>
</property>
<property name="interceptors">
<bean class="org.springframework.ws.server.endpoint
.interceptor.PayloadLoggingInterceptor" />
</property>
</bean>
<bean id="simple" class="org.springframework.ws.wsdl.wsdl11
.DynamicWsdl11Definition">
<property name="builder">
<bean class="org.springframework.ws.wsdl.wsdl11.builder
.XsdBasedSoap11Wsdl4jDefinitionBuilder">
<property name="schema"
value="/WEB-INF/simple.xsd" />
<property name="portTypeName" value="simple" />
<property name="locationUri"
value="http://localhost:8080/simpleWeb1/
simpleService/" />
<property name="targetNamespace"
value="http://mytutorial.com/definitions" />
</bean>
</property>
</bean>
</beans>

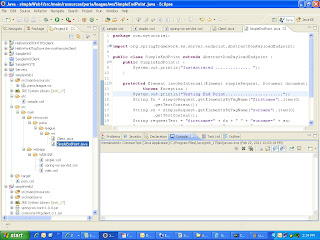
Step 11: The next step is to define the end point class as shown below to read the incoming XML request and construct an XML response back to the caller. Create a new package paria.league.ws under “resource” and then create the java file “SimpleEndPoint.java”.
package paria.league.ws;
import org.springframework.ws.server.endpoint.AbstractDomPayloadEndpoint;
import org.w3c.dom.Document;
import org.w3c.dom.Element;
public class SimpleEndPoint extends AbstractDomPayloadEndpoint {
public SimpleEndPoint() {
System.out.println("Instantiated .............. ");
}
protected Element invokeInternal(Element simpleRequest,
Document document) throws Exception {
System.out.println("Testing End Point.......................");
String fn = simpleRequest.getElementsByTagName("firstname")
.item(0).getTextContent();
String sn = simpleRequest.getElementsByTagName("surname").item(0)
.getTextContent();
String requestText = "firstname=" + fn + " " + "surname=" + sn;
System.out.println("request is for: " + requestText);
Element responseElement = document
.createElement("simpleResponse");
responseElement.setTextContent(fn + " " + sn);
return responseElement;
}
}
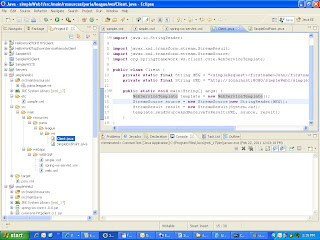
Step 12: Finally we need to create a Web Services client named “Client.java” to invoke our web service.
package paria.league.ws;
import java.io.StringReader;
import javax.xml.transform.stream.StreamResult;
import javax.xml.transform.stream.StreamSource;
import org.springframework.ws.client.core.WebServiceTemplate;
public class Client {
private static final String MSG =
"<simpleRequest>
<firstname>John</firstname>
<surname>Smith</surname>
</simpleRequest>";
private static final String URL = "http://localhost:8080/simpleWeb1/simpleService/";
public static void main(String[] args) {
WebServiceTemplate template = new WebServiceTemplate();
StreamSource source = new StreamSource(new StringReader(MSG));
StreamResult result = new StreamResult(System.out);
template.sendSourceAndReceiveToResult(URL, source, result);
}
}
Step 13: Add jar files for build project.
commons-httpclient-3.1.jar
commons-logging-1.1.1.jar
spring-beans-2.5.6.jar
spring-context-2.0.4.jar
spring-core-2.5.6.jar
spring-ws-core-1.0.0.jar
spring-xml-1.0.0.jar
Step 14: Open consol and go to workspace directory and build package war file.
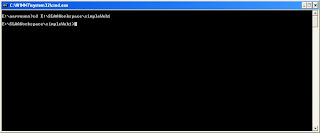
Step 15: Write command line build E:\SLAAWorkSpace\simpleWeb1> mvn package
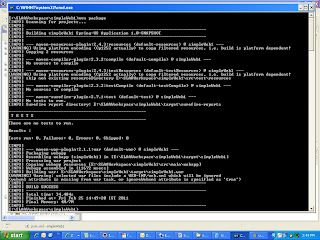
Step 16: War file will be store in target folder in the project.
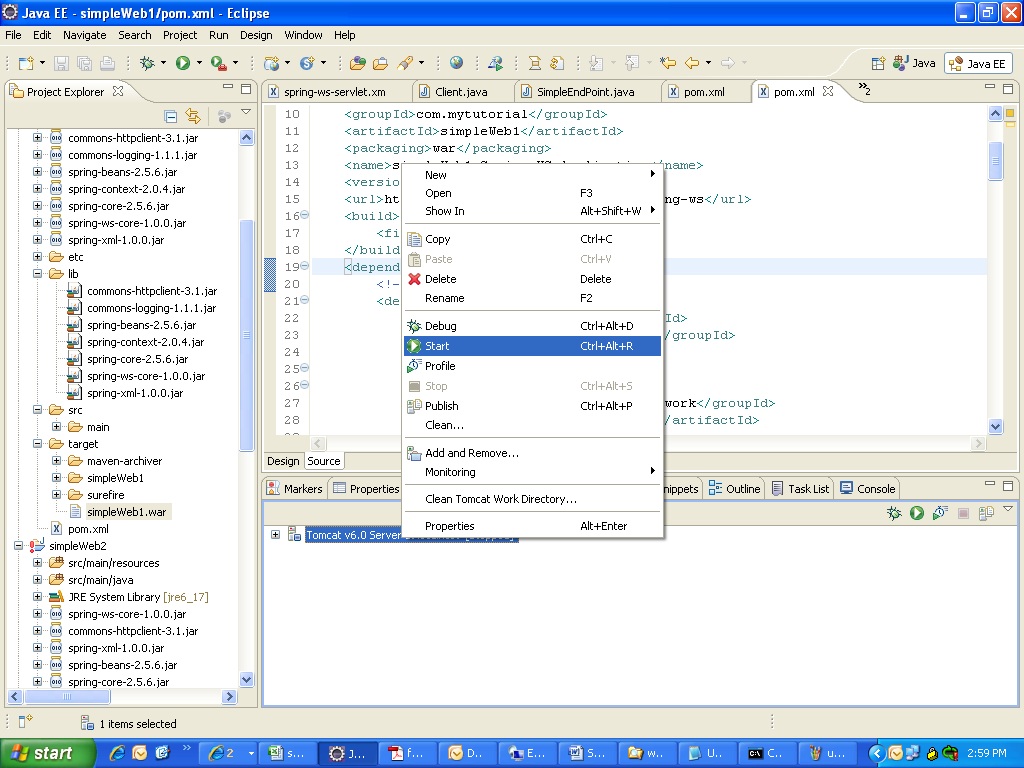
Step 17: Copy war file and past it in webapps directory in tomcat. Deploy the “simpleWeb1” war file into Tomcat under eclipse and start the Tomcat Server.
Step 18: start the Tomcat Server.
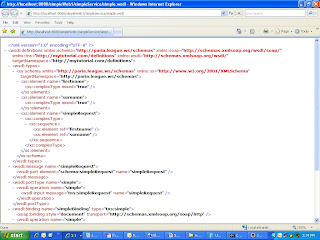
Step 18: Open up a browser and type the following URL http://localhost:8080/simpleWeb1/simpleService/simple.wsdl to look at the generated simple.wsdl file as shown below:
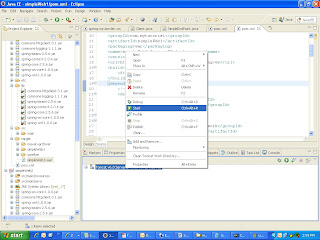
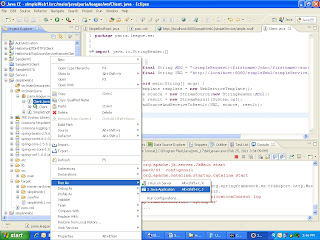
Step 18: Now run client and get the response. Right clienk on client.java =>run as =>java application
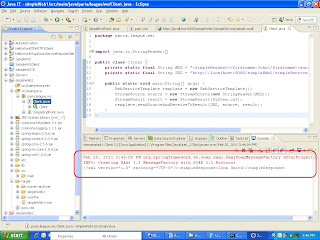
Client output
---------------------------------------
This tutorial will guide you through building a simple web service using spring framework. This tutorial assumes that you have gone through Tutorials 1-10 & the source code for tutorials 1-10. Also refer to spring-ws-reference.pdf (http://www.lulu.com/items/volume_62/1253000/1253871/1/print/1253871.pdf & http://static.springframework.org/spring-ws/site/reference/pdf/spring-wsreference.pdf) for further information.
Step 0: Open command prompt and the go to project base directory. Here E:\aarruunn>

Step 1: Create a project named simpleWeb1. Run the following command in a command window:
C:\aarruunn> mvn archetype:create -DarchetypeGroupId=org.springframework.ws
-DarchetypeArtifactId=spring-ws-archetype -DarchetypeVesrion=1.0.0
-DgroupId=paria.league.ws -DartifactId=simpleWeb1
Note: Maven2 archetype:create is deprecated so first command may not be worked then you get error. Please used second command.

Or
C:\ aarruunn> mvn archetype:generate
-DarchetypeGroupId=org.springframework.ws
-DarchetypeArtifactId=spring-ws-archetype -DarchetypeVesrion=1.0.0
-DgroupId=paria.league.ws -DartifactId=simpleWeb1
In second command ask for the package name verification Y:. Provide y and press enter button to create project structure.
package: paria.league.ws
Y: : y

Step 2: Now you should have the simpleWeb1 project with some basic files like pom.xml simpleWeb1 folder and web.xml, spring-ws-servlet.xml under WEB-INF folder.

Step 3: Next step is to generate eclipse metadata using the mvn command as shown below: C:\tutorials\simple-tutorial\simpleWeb2>mvn eclipse:eclipse

Step 4: Open the pom.xml file under “C:\aarruunn\simpleWeb1” in a notepad and modify it to look as shown below.
<?xml version="1.0" encoding="UTF-8"?>
<project>
<!--<parent>
<artifactId>SLAAWorkspace</artifactId>
<groupId>com.mytutorial</groupId>
<version>1.0</version>
</parent>
-->
<modelVersion>4.0.0</modelVersion>
<groupId>com.mytutorial</groupId>
<artifactId>simpleWeb1</artifactId>
<packaging>war</packaging>
<name>simpleWeb1 Spring-WS Application</name>
<version>1.0-SNAPSHOT</version>
<url>http://www.springframework.org/spring-ws</url>
<build>
<finalName>simpleWeb1</finalName>
</build>
<dependencies>
<!-- Spring web services -->
<dependency>
<artifactId>spring-xml</artifactId>
<groupId>org.springframework.ws</groupId>
<version>1.0.0</version>
<exclusions>
<exclusion>
<groupId>org.springframework</groupId>
<artifactId>spring-core</artifactId>
</exclusion>
<exclusion>
<groupId>org.springframework</groupId>
<artifactId>spring-beans</artifactId>
</exclusion>
<exclusion>
<groupId>commons-logging</groupId>
<artifactId>commons-logging</artifactId>
</exclusion>
<exclusion>
<groupId>jdom</groupId>
<artifactId>jdom</artifactId>
</exclusion>
<exclusion>
<groupId>dom4j</groupId>
<artifactId>dom4j</artifactId>
</exclusion>
</exclusions>
</dependency>
<dependency>
<artifactId>spring-oxm-tiger</artifactId>
<groupId>org.springframework.ws</groupId>
<version>1.0.0</version>
<exclusions>
<exclusion>
<groupId>org.springframework</groupId>
<artifactId>spring-core</artifactId>
</exclusion>
<exclusion>
<groupId>org.springframework</groupId>
<artifactId>spring-beans</artifactId>
</exclusion>
<exclusion>
<groupId>commons-logging</groupId>
<artifactId>commons-logging</artifactId>
</exclusion>
<exclusion>
<groupId>com.thoughtworks.xstream</groupId>
<artifactId>xstream</artifactId>
</exclusion>
</exclusions>
</dependency>
<dependency>
<artifactId>spring-ws-core-tiger</artifactId>
<groupId>org.springframework.ws</groupId>
<version>1.0.0</version>
<exclusions>
<exclusion>
<groupId>org.springframework</groupId>
<artifactId>spring-core</artifactId>
</exclusion>
<exclusion>
<groupId>org.springframework</groupId>
<artifactId>spring-beans</artifactId>
</exclusion>
<exclusion>
<groupId>org.springframework</groupId>
<artifactId>spring-context</artifactId>
</exclusion>
<exclusion>
<groupId>org.springframework</groupId>
<artifactId>spring-web</artifactId>
</exclusion>
<exclusion>
<groupId>org.springframework</groupId>
<artifactId>spring-webmvc</artifactId>
</exclusion>
</exclusions>
</dependency>
<dependency>
<groupId>com.sun.xml.messaging.saaj</groupId>
<artifactId>saaj-impl</artifactId>
<version>1.3</version>
<scope>runtime</scope>
<exclusions>
<exclusion>
<groupId>javax.activation</groupId>
<artifactId>activation</artifactId>
</exclusion>
</exclusions>
</dependency>
<dependency>
<groupId>javax.activation</groupId>
<artifactId>activation</artifactId>
<version>1.1</version>
</dependency>
<dependency>
<groupId>javax.servlet</groupId>
<artifactId>servlet-api</artifactId>
<version>2.4</version>
<scope>provided</scope>
</dependency>
<dependency>
<groupId>jdom</groupId>
<artifactId>jdom</artifactId>
<version>1.0</version>
</dependency>
<dependency>
<groupId>jaxen</groupId>
<artifactId>jaxen</artifactId>
<version>1.1</version>
</dependency>
<dependency>
<groupId>javax.xml.soap</groupId>
<artifactId>saaj-api</artifactId>
<version>1.3</version>
<scope>runtime</scope>
</dependency>
<dependency>
<groupId>org.springframework</groupId>
<artifactId>spring</artifactId>
<version>2.0.6</version>
</dependency>
</dependencies>
</project>
Note: The
Step 5: We can now import this project into eclipse. File => Import and then

Clieck Next => Browse select simpleWeb1 project structure and OK.

Click on Finish


Step 6: Next step is to create a folder “java” for the java files under “src/main”. Right click on simpleWeb1 and select “properties”. Click on
simpleWeb1 => properties => addFolder

Click on Create New Folder provide java and Finish

Step 7: Now define the input XML file and its contract. Create a new folder “etc” under “simpleWeb1” for any miscellaneous files like “simple.xml” that are not packaged.
<simpleRequest>
<firstname>John</firstname>
<surname>Smith</surname>
</simpleRequest>

Step 8: The next step is to define the schema definition for the above xml file. The “simple.xsd” should be created under “C:\tutorials\simple-tutorial\simpleWeb2\src\main\webapp\WEBINF” as shown below:
<xs:schema xmlns:xs="http://www.w3.org/2001/XMLSchema"
targetNamespace="http://mytutorial.com/schemas"
xmlns="http:// paria.league.ws/schemas">
<xs:element name="firstname">
<xs:complexType mixed="true" />
</xs:element>
<xs:element name="surname">
<xs:complexType mixed="true" />
</xs:element>
<xs:element name="simpleRequest">
<xs:complexType>
<xs:sequence>
<xs:element ref="firstname" />
<xs:element ref="surname" />
</xs:sequence>
</xs:complexType>
</xs:element>
</xs:schema>

Step 9: The web.xml can remain as it is.

Step 10: With spring-ws, you do not have to define the .wsdl file. It will be automatically generated based on your simple.xsd file you just created and the simple-ws-servlet.xml (the file convention is -servlet.xml) file you are about to define.
<?xml version="1.0" encoding="UTF-8"?>
<beans xmlns="http://www.springframework.org/schema/beans"
xmlns:xsi="http://www.w3.org/2001/XMLSchema-instance"
xsi:schemaLocation="http://www.springframework.org/schema/beans
http://www.springframework.org/schema/beans/spring-beans-2.0.xsd">
<bean id="simpleEndPoint" class="paria.league.ws.SimpleEndPoint" />
<bean class="org.springframework.ws.server.endpoint
.mapping.PayloadRootQNameEndpointMapping">
<property name="mappings">
<props>
<prop key="simpleRequest">simpleEndPoint</prop>
</props>
</property>
<property name="interceptors">
<bean class="org.springframework.ws.server.endpoint
.interceptor.PayloadLoggingInterceptor" />
</property>
</bean>
<bean id="simple" class="org.springframework.ws.wsdl.wsdl11
.DynamicWsdl11Definition">
<property name="builder">
<bean class="org.springframework.ws.wsdl.wsdl11.builder
.XsdBasedSoap11Wsdl4jDefinitionBuilder">
<property name="schema"
value="/WEB-INF/simple.xsd" />
<property name="portTypeName" value="simple" />
<property name="locationUri"
value="http://localhost:8080/simpleWeb1/
simpleService/" />
<property name="targetNamespace"
value="http://mytutorial.com/definitions" />
</bean>
</property>
</bean>
</beans>

Step 11: The next step is to define the end point class as shown below to read the incoming XML request and construct an XML response back to the caller. Create a new package paria.league.ws under “resource” and then create the java file “SimpleEndPoint.java”.
package paria.league.ws;
import org.springframework.ws.server.endpoint.AbstractDomPayloadEndpoint;
import org.w3c.dom.Document;
import org.w3c.dom.Element;
public class SimpleEndPoint extends AbstractDomPayloadEndpoint {
public SimpleEndPoint() {
System.out.println("Instantiated .............. ");
}
protected Element invokeInternal(Element simpleRequest,
Document document) throws Exception {
System.out.println("Testing End Point.......................");
String fn = simpleRequest.getElementsByTagName("firstname")
.item(0).getTextContent();
String sn = simpleRequest.getElementsByTagName("surname").item(0)
.getTextContent();
String requestText = "firstname=" + fn + " " + "surname=" + sn;
System.out.println("request is for: " + requestText);
Element responseElement = document
.createElement("simpleResponse");
responseElement.setTextContent(fn + " " + sn);
return responseElement;
}
}

Step 12: Finally we need to create a Web Services client named “Client.java” to invoke our web service.
package paria.league.ws;
import java.io.StringReader;
import javax.xml.transform.stream.StreamResult;
import javax.xml.transform.stream.StreamSource;
import org.springframework.ws.client.core.WebServiceTemplate;
public class Client {
private static final String MSG =
"<simpleRequest>
<firstname>John</firstname>
<surname>Smith</surname>
</simpleRequest>";
private static final String URL = "http://localhost:8080/simpleWeb1/simpleService/";
public static void main(String[] args) {
WebServiceTemplate template = new WebServiceTemplate();
StreamSource source = new StreamSource(new StringReader(MSG));
StreamResult result = new StreamResult(System.out);
template.sendSourceAndReceiveToResult(URL, source, result);
}
}

Step 13: Add jar files for build project.
commons-httpclient-3.1.jar
commons-logging-1.1.1.jar
spring-beans-2.5.6.jar
spring-context-2.0.4.jar
spring-core-2.5.6.jar
spring-ws-core-1.0.0.jar
spring-xml-1.0.0.jar

Step 14: Open consol and go to workspace directory and build package war file.

Step 15: Write command line build E:\SLAAWorkSpace\simpleWeb1> mvn package

Step 16: War file will be store in target folder in the project.

Step 17: Copy war file and past it in webapps directory in tomcat. Deploy the “simpleWeb1” war file into Tomcat under eclipse and start the Tomcat Server.

Step 18: start the Tomcat Server.
Step 18: Open up a browser and type the following URL http://localhost:8080/simpleWeb1/simpleService/simple.wsdl to look at the generated simple.wsdl file as shown below:

Step 18: Now run client and get the response. Right clienk on client.java =>run as =>java application

Client output

Subscribe to:
Posts (Atom)